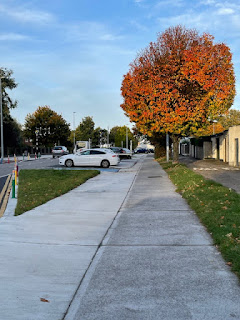
Just love it when colours pop. It draws the eye and, let’s face it, it’s just beautiful. Thanks to the age of smartphones it’s really easy to get a picture taken. So no excuses. This one was taken on the way to my daughter’s school.
08 October 2024
Pop!!!
28 September 2024
Pinhole on Paper
I have a new obsession, as I mentioned previously. Pinhole photograpy.
In fact, I think I might be obsessed with film photography as well 😉.
I recently printed myself a 4 x 5 pinhole camera on the old 3d printer. I managed to secure some 4 x 5 film holders all the way from Japan and some 4 x 5 Illford direct positive paper.
And off I went.
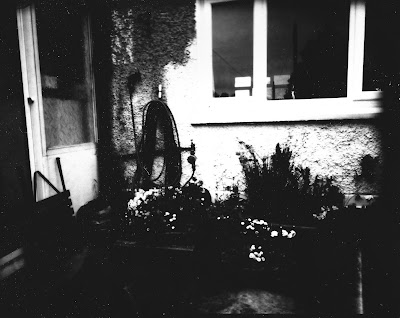
This one is a photo of my back garden. Of course still mucking about with the exposure times etc.
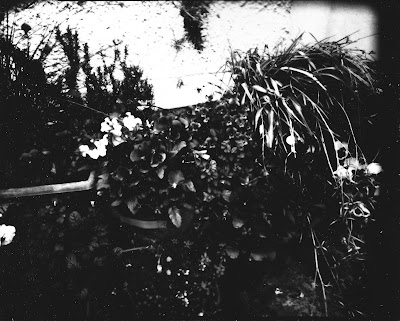
For this one I concentrated more on the flowers. A little bit of a close-up, Mr. DeVille.
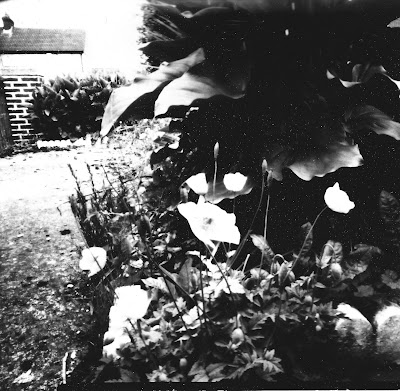
This was a shot taken in my front garden. There was a nasty little light leak and I had to crop it out when I scanned it. I am going to venture a guess that the film holder is not 100% light proof because the photo taken with the reverse paper also had a nasty little light leak. Still working on a solution...
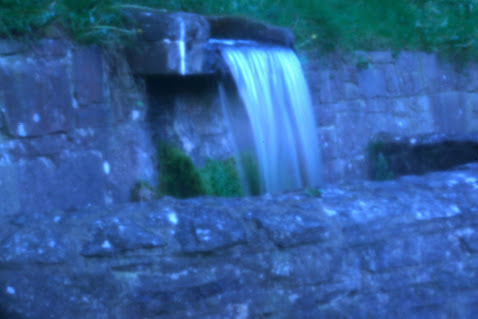
I then drove down to a weir near my house. This was the result.
You can see the light leak in the corner there. Did not want to crop that one out though. Adds a little to the ambiance.
I have also made a tin can camera from an old coffee can. The pinhole was punched in using a needle, to I am still experimenting with the exposure times, but the initial experiments looks promising....
Clearly a little underexposed, but I am happy with the outcome.
And this one was clearly a little over-exposed. I prefer the darker image, I have to admit.
I need to get out and do some more shooting with the printed pinhole camera. I am thinking the beach.
So "Watch this space"..... more to follow.
25 July 2024
Sneaky Little Murals
There is a lane that runs to the back of my house. I use it a lot, but mostly to get around to the street in front. If you make a left, you can actually get quite far via the lane. I did that the other day. Just because.
Coming around the corner I came across this one:
I had to smile.
Out came the iPhone (whatever did we do before the iPhone).
Turned round and followed the lane.
Then, just around the corner I came across this little masterpiece:
Very Grace Jonesy.
Not sure who the artist is, but well done Sir or Madam. That is some serious talent there.
The moral of the story? Always have your phone at the ready, you never know when art will happen.
07 May 2024
New adventures in analogue
And then I bought a Praktica BX20 camera, because... well, you know. And I have been running around, shooting all manner of photos.
Now, when it comes to me and lighting, I believe that I am cursed, or at least very unlucky at a minimum. If I take a camera out without a tripod, then it will, without warning, cloud over and I will be shooting blurry images, or using trees, fences and other paraphernalia to support the camera.
With film photography, it now seems that the opposite is true. When I have an ISO400 film loaded, it will magically turn into the brightest, sunshine day that Ireland has ever experienced.
But I will not be defeated.
I have managed to get at least a handful of decent shots. I also managed to overdevelop the film, which does make for a much grainier effect than was intended.
(Note to self, do not touch your timer when it is running. That stops it).
I have also noted that the light meter of the Praktica seems to be about 2 stops out when compared to the light meter app that I installed on my iPhone. A light meter app that came highly recommended. Funny that I get the same result when I measure it against my digital camera's light meter.
Ups (with the correct German pronunciation).
But I will prevail. I have also noted that my DSLR scanning seems to be the culprit causing the soft focus on the borders. I am currently using a close-up filter to zoom in close enough on the negative and I suspect the filter, which is quite convex, may be the issue here. No, I do not have a macro lens (not one that works at that close a range anyway). So I ordered some extension tubes. They will be here tomorrow. Will keep you posted.
Which now begs the next question, is my scanning the issue, or am I not getting the focusing 100% correct. I will admit that this is my first venture into a rangefinder focusing system, and it takes some getting used to. I wear varifocal glasses and it is just impossible for me to focus a DSLR with them on. I always have to pop them on my head and put them back on when I am done shooting. With the rangefinder I do not have that problem, but I do find that I am not framing up 100% squarely. Something to work on. Getting there.
But am I loving it? Hell, yeah! I cannot remember a time when I have enjoyed photography as much as I am right now. And the more analogue I do, the more I want to do.
So I have now also bought a Medium Format Illford point and shoot. Cheap as chalk, but with no guarantee that it will work. I have checked and it seems that the "Sunny" setting might be a bit of a problem. Looks like the shutter opens only half way. But I will give it a go. The "Cloudy" setting has everything working as it should (seemingly) so I will have a try.
My pinhole camera is all printed and ready to go. Just waiting for the pinhole lens to arrive. I have also made a drinks tin pinhole camera because, why not. Just waiting for some decent weather to try it out.
F Stop on the tin can - F250 ish. Should be interesting.
28 April 2024
Obsessions and Addictions
OK, confession time.
I have developed an (un)healthy obsession with pinhole photography.
What started out as an experiment in "something different" has now turned into a full blown obsession.
I have always been a bit of a tinkerer, and this journey is really engrossing me. Unusually, I got the order the wrong way round, starting out on the digital side of pinhole photography and now working my way back to the more traditional way of doing it.
The photo above is of the Dodder Waterfall in Tallaght, in Dublin. This is probably my 10th attempt at making a perfect pinhole. Definitely getting better at it, but not quite there yet.
In desperation, I have now succumbed and ordered pinholes from this lad. Unfortunately he is on vacation at the moment, so there I am, waiting.
No worries.
In the meantime, I have dipped my toes gently into the trap that is analogue photography.
I am hooked.
I have previously written my Ode to the instamatic camera and it's 4 x 4 prints. I can now, with confidence, say that it was due to the 126 film, that this square format was the flavor of the month. Shortly after writing that, I wondered what it would be like to take a similar type of photograph in this day and age. Enter the 35mm point and shoot. A Ricoh I bought on ebay. I tested it on a trip to the beautiful Glendalough and then took it with me to Bohernabreena Reservoirs. Instant addiction!!
There is nothing with as much soul as a proper film photograph. Pity that processing and printing has become so costly. In my ignorance I purchased an Illford HP5+ film to test the camera, only later to find out that the developing cost for this film is higher as it cannot be developed locally by the lab!? Has to be sent away.
So I bought my own development kit from thephotohsop.ie, because that is the type of person I am.
Doubly hooked now.
There is nothing to compare with the feeling of developing your own film.
And then on to the digitizing of the film. Now if you look at the bottom of the photo above, you will see that the focus has gone a little south there. It could be the camera... the last 35mm film camera I owned back in 2002 did exactly that. Or it can be that the film is not held 100% flat when I scan it (a process that will be the subject of another post, to be sure).
So being the tinkerer that I am, I have now designed my own film holder, and will be designing a more manageable scanning process to get it all spot on. Watch this space.
I am however now firstly busy with building a pinhole camera. Yes building or, more accurately, printing. Will test drive it with photo positive paper and may then try film on it as well. Or negative paper. Oh the endless possibilities!!!
And that is my story for today. I have sooooo much I want to explore in film photography, that I find myself doing more than one thing at a time. Bad idea.
So, deep breath.
4x5 Pinhole Camera first....
14 April 2024
Pinhole?
I am a self taught photographer. On top of that, most of my photography happened during the digital era. So I was intrigued when I came across pinhole photography.
Pinhole photography is a fascinating technique that takes us back to the roots of capturing images. Forget fancy lenses and complex settings – all you need is a light-tight box, a tiny hole, and some light-sensitive material. If you are, like me, stuck with all types of digital cameras and no light sensitive material except my stash of 35mm film, then you improvise and go all high low tech.
Pinhole photography is all about going back to basics. Instead of relying on high-tech cameras, it embraces simplicity, using a small hole to create stunning images. Dating back to ancient times, pinhole photography has evolved into a beloved hobby and artistic medium.
I love the blurry, retro look that you get from the pinhole photographs. I meandered down to one of the local parks this morning, all gung ho and fired up. Then realised it is not as easy as it looks. I did get some reasonable images, but the bulk of them were a little too blurry.
Pinhole photography requires the lens (pin hole) to be perfectly round and punched through a very thin material. I used an old aluminum can to punch the hole in. Went for a couple of different size holes, and tried some of them.
Now, bear in mind that the lens is, in fact, now a hole, and will not stop any dust from entering the camera. I therefore whipped out my old Canon 20D and started experimenting.
The first thing that was absolutely crystal clear to me is that the 20D's sensor was EXTREMELY dirty. Because of the small hole the aperture is in the 150's range. This gives a pinhole camera a ridiculous depth of field. So ridiculous, in fact, that the dust on the sensor is now in focus.
The results were much better.
For the smallest pinhole I have made, the images came our reasonably well, albeit a little on the underexposed side. I'm working on that.
Due to the small aperture, the exposure times goes up to the 30 second range. It gives the images a dreamy, soft look which I particularly like.
I then proceeded to change the insert to a larger pinhole.
Well, disaster.
The focus was well out, making even the blur lover going "That's not right!"
The two photos below was taken of the same area, one with the smaller pinhole, the other with the larger pinhole. The difference is plain to see.

|

|
Granted, the exposure on the second image was better, but that was due to the fact that the shutter speed came back greatly due to the increase in aperture size. (Just a side note, I do not have a remote release for the 20D, so bulb mode is not an option. 30seconds is my max shutter speed and that is why the other images are underexposed).
So back to the drawing board then? Oh yes.To create your own pinhole masterpieces, you'll need just a few basic materials and a bit of patience. So, grab a cardboard box, make a tiny hole, and let your creativity shine through the magic of pinhole photography. For further information you can delve into the following websites:
The Pinhole Camera - Make your own camera and explore the history of pinhole photography: www.thepinholecamera.com
Pinhole Visions - A community hub for pinhole enthusiasts, featuring galleries, tutorials, and forums: www.pinholevisions.org
Pinhole Resource - Dive deeper into the technical aspects of pinhole photography with articles, workshops, and resources: www.pinholesolutions.co.uk
07 April 2024
Not a Puddle of Mudd
And the title here is my best attempt at being clever. It also gives away my age!!
In the early noughties, the band, Puddle of Mudd, had a hit with the song "Blurry".
Clever, hey?
But back to the task at hand!!
I recently came across the work of Olga Karlovac. She is a street photographer that does absolutely beautiful work, all with blurry images. You really have to look at her work to appreciate it.
The image below is from her Instagram feed. I would highly recommend you go and have a look. I really like her work. Stunning.
I also love her street and building images. The effect on the images of the pedestrians are spectacular.
Which now brings us back to the image at the top of this post. My feeble attempt at recreating the same effect. Now, I have to say, I think it is not that bad. It is however not as easy as it looks to achieve the effect. Hat tip to Olga. Funny how you get everything blurry and out of focus until you purposefully want to achieve the effect!!
I have also tied to recreate the effect in colour:
Granted, it was an experiment, it was difficult to judge if the effect worked correctly on the camera's LCD, and I was not sure if colour was, in fact, the best choice.
I do think though, that the effect is quite nice. I am also going to go out on a limb here saying that the woods lends itself to this effect in colour. Not sure how colour would work in street photography. But I am willing to give it a go.
To check out some of Olga Karlovac's work, you can find here website here.
-
Walked my daughter to school the other day. As the sun started rising I was greeted with these stunning views: Takes your breath away. In ...
-
For the longest time I've had a fascination with clouds. Living most of my life on the Highveld of South Africa, I've come to love ...
-
I have a new obsession, as I mentioned previously. Pinhole photograpy. In fact, I think I might be obsessed with film photography as well ...
