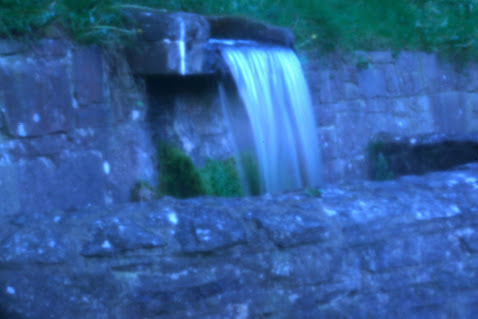
I am a self taught photographer. On top of that, most of my photography happened during the digital era. So I was intrigued when I came across pinhole photography.
Pinhole photography is a fascinating technique that takes us back to the roots of capturing images. Forget fancy lenses and complex settings – all you need is a light-tight box, a tiny hole, and some light-sensitive material. If you are, like me, stuck with all types of digital cameras and no light sensitive material except my stash of 35mm film, then you improvise and go all high low tech.
Pinhole photography is all about going back to basics. Instead of relying on high-tech cameras, it embraces simplicity, using a small hole to create stunning images. Dating back to ancient times, pinhole photography has evolved into a beloved hobby and artistic medium.
I love the blurry, retro look that you get from the pinhole photographs. I meandered down to one of the local parks this morning, all gung ho and fired up. Then realised it is not as easy as it looks. I did get some reasonable images, but the bulk of them were a little too blurry.
Pinhole photography requires the lens (pin hole) to be perfectly round and punched through a very thin material. I used an old aluminum can to punch the hole in. Went for a couple of different size holes, and tried some of them.
Now, bear in mind that the lens is, in fact, now a hole, and will not stop any dust from entering the camera. I therefore whipped out my old Canon 20D and started experimenting.
The first thing that was absolutely crystal clear to me is that the 20D's sensor was EXTREMELY dirty. Because of the small hole the aperture is in the 150's range. This gives a pinhole camera a ridiculous depth of field. So ridiculous, in fact, that the dust on the sensor is now in focus.
The results were much better.
For the smallest pinhole I have made, the images came our reasonably well, albeit a little on the underexposed side. I'm working on that.
Due to the small aperture, the exposure times goes up to the 30 second range. It gives the images a dreamy, soft look which I particularly like.
I then proceeded to change the insert to a larger pinhole.
Well, disaster.
The focus was well out, making even the blur lover going "That's not right!"
The two photos below was taken of the same area, one with the smaller pinhole, the other with the larger pinhole. The difference is plain to see.

|

|
Granted, the exposure on the second image was better, but that was due to the fact that the shutter speed came back greatly due to the increase in aperture size. (Just a side note, I do not have a remote release for the 20D, so bulb mode is not an option. 30seconds is my max shutter speed and that is why the other images are underexposed).
So back to the drawing board then? Oh yes.To create your own pinhole masterpieces, you'll need just a few basic materials and a bit of patience. So, grab a cardboard box, make a tiny hole, and let your creativity shine through the magic of pinhole photography. For further information you can delve into the following websites:
The Pinhole Camera - Make your own camera and explore the history of pinhole photography: www.thepinholecamera.com
Pinhole Visions - A community hub for pinhole enthusiasts, featuring galleries, tutorials, and forums: www.pinholevisions.org
Pinhole Resource - Dive deeper into the technical aspects of pinhole photography with articles, workshops, and resources: www.pinholesolutions.co.uk


No comments:
Post a Comment